A gentler rant  

Posted by Tin Magpie in ,

Well, I made a custom banner for this blog but apparently it won't work with the template I'm using...sad. But here it is anyway
I had fun with it.

As I've stated before, this blog is tracking my progress on steampunking a laptop, yet the title says it's a journey. The other reason (as I've stated before) is to explore this subculture. I've made it a point to slink (and even comment sometimes!) around the Brass Goggles forum. Those of you that are new to steampunk should give it a gander! I recommend a couple of threads to start off with
I've learned a lot from just perusing around the forum, a lot about the trends and fashions of the genre. About what is gluing-gears-to-things "steampunk" and what's using-gears-on-things Steampunk, and clockpunk vs steampunk vs dieselpunk and the street-urchins, the scientists, the dapper-dan punks of Steampunk (pg 8) about gears and spray-painted nerf guns amongst other projects people start off with. It's definitely been an adventure, like walking into a different country and having to learn and respect all the cooky stuff you don't understand just yet.

That was link-tastic!

Better again!  

Posted by Tin Magpie in , , ,

Discovery: Printer at work= the god of printers. So crisp and so clean! I finished up my odd keys (along with reprinting R and Alt) and sealed them. The tiny buttons I left a white background, thinking teeny white numbers would get lost in the black. They discolored a bit, but they look a little like marble. ...Sweet? After a test with the other keys, they looked nice and almost antiquey so I'm keeping them. I wish I had gotten a shot before I went on working on the keyboard. I found some contact sticky-paper that I covered the touch-pad, mouse buttons and the negative space by the arrow keys. The contact paper doesn't interfere with the touch-pad, and it has a nice metallic grain.

Off to correct my mistakes with a different tool and a more critical eye. This time, for my frame, I cut the large strip of moulding into smaller sections: Back, front, 2 sides. After I measured everything around 8 times, maybe 9, I beveled one side, then remeasured. I did this with every piece until everything was even and perfect. Each piece was then cut in half and matched to its partner with a number (1-4, not hard stuff). I didn't construct the frame, however. Last time, I shot nails into the sides and it smushed the hell out of it. I'm going to use small L-brackets to screw in from the inside. Hopefully this won't disturb the staining along with not destroying it. I also need to drill the air vents and what-not. I hope I don't screw this up again.

So, I went through all my receipts and calculated a cool of $104.17 in total. The reason for the jump was that I wanted to leave out the costs of something til I used that something, but then I forgot what and how much that something cost. Now it's all in, 104 huh? Hmmm.....No! I mustn't waver from my Dellcinea!

  • Hours: 3 - 21 in total
  • Cost: 1 pair of very cute pumps, or 2 decently priced pair of boots...

'Lessons Learned'  

Posted by Tin Magpie in , , ,

That's going to be the new label for my mistakes, lol I've added a little label cloud so if there's something specific readers want misinformation/false hopes/advice on, they can click on 'keyboard' ...or 'lessons learned'.
I went out to assess the frame situation. Oh, Lord. I didn't make rectangles, I made a sort of different parallelogram. What's weird was that if the original edges were together, it looked terrible, but factory edge to factory edge it didn't look...half...bad from the front. The back edge didn't align though. After a good hard look at it, I came to the conclusion that if I already poured 60 bucks into this, it should be damn near perfect. Another $16 won't break the bank.

There was one very important thing I forgot to account for on my 'first draft': Vents. There are about 6 in total vents I probably should have considered cutting before assembling the fragile formation. I considered f-hole shapes (at least for the sound vents) as they have a natural undulation to them that is so art nouveau, but I feel like that's swiping from Datamancer's design. As for the fan vents, I have no idea as of yet. I did, however, take this opportunity to see how my moulding would look with holes sawed into it. They're crude holes, but I was basically trying to get the idea of how ridiculous it would look. The bottom part of Right pic (which is the top of the box, still following?) looks fine, I'm having mixed feelings about the top views though. The wood is so thick, I'm wondering if it will look hideous later on...I'm still going to have to buy more wood.

Crest-fallen yet again, I looked forward to the sunny and dry weather so I could seal my keys. And guess what people? They look great! Finally! I sprayed 2 coats of clear lacquer on them, and they are nice and shiny now. Done with the normal keys, I went to fit my odd-shaped ones and realized they are a little too big. Easy fix though, I snipped off some of the frilliest stuff with the good ol' tin snips, now they fit just fine. I finished snipping holes in my velvet backing too, and after a quick lint-brushing (I forgot velvet picks up Everything), it was fitted to the keyboard and I gave the keys a test fit. Everything fits!! Only some minor velvet problems, but otherwi-where is 'r'?...WHERE IS R?! It was there! And now it's gone?! Ok, so missing r aside-Where is Alt? Alt, I swear to God. Ok, so everything went kinda smoothly. After checking my photoshop, a second Alt was never there, but r remains missing, scared and alone. I'm in the process of making the odd-keys, and those damn tiny keys up top, and maybe an extra r if the wolves don't find him first.

  • Hours: 2 = 18 total
  • Out: Still 61...I think I'll check my receipts, I forgot what I left out...

I'm too picky when it comes to gears...  

Posted by Tin Magpie in , , , ,

It was too humid to finish my keys today. I was afraid the moisture would effect the sealant, so I decided to let it sit for another day. I did find some cute buttons that will fit for my F1-12 keys and what not. I punched guide holes in a new sheet of velvet (black velvet, if you please) using a scan of my comp. Helped a lot, clever idea Von Slatt, sensible too. Normal keys out of the way, I ventured to grand ol' Micheal's to hopefully find something for my Ctrl, Tab, and other odd shaped keys. I looked pretty weird to the old hobby ladies sizing up my computer keys. One lady even asked what I was doing. This time I was prepared with a response! After trying to explain 'a subculture based on the theory that instead of gasoline and whatnot, we used steam for energy. Other influences include the victorian fashion, a love for engineering, and airships' I just lost people. Instead I told this beading lady that I was making my laptop look like an old jewelry box. Way simpler, and I look way less crazy. I found some perfect, and slightly decorative, brass plates for my tabs, shifts, and ctrls. But finding a long, skinny space bar was rather difficult. I'm hoping I can solder these two pieces together and make a decent space bar.

Time for some big tools. Today, I started the frame for my laptop. 3 inches in width, I cut the strip in half (rather, my father did, as I shot) with a table saw. After cutting and beveling the edges to fit, good old fashioned wood glue held it together while I shot 1inch nails into the corners to secure it. The bottom turned out fine, the top...not so good. I wish I had a picture, I'll update it later. The moulding was very thin on top, and getting the nails in without shooting them through the sides was very frustrating. And even with the countless measuring (you know, measure twice, cut once, nyuk nyuk nyuk) the top was just a smidge bigger than the bottom. Ugh. Either I figure out how to make the two fit, or I start over with a new strip. If I do a do-over, I would probably make the whole box, then cut it in half with the table saw. Dellcinea...you are a right harlot sometimes.

I know this is a long post, but I thought I'd take some time to explain this blog. It's not a how-to, by any means, just an account of the trials and tribulations of a project. It's something I wish I had when I started this project. I read something in the Steampunk Magazine: 'If you meet a steampunk craftsman and he or she doesn't want to tell you how he or she creates her stuff, that's a poseur who should be avoided'. Brilliant stuff, and capitol reading material for you punkers-to-be out there. I think this is a noble statement. I imagine there might be some hesitation for fear of copy-cats, or 'the man', but nothing can really take away the maker's personal touch and emotion out of their creation. That said, I totally found some mass produced steampunk items! Gears! Congratulations Mainstream, you found 'steampunk'! I first laughed at this, but then I remembered I spent over an hour just looking for reasonably priced gears and found either that they were too expensive, or too small. These actually might work in a pinch.

  • Hours: 2 - 16 total
  • Cash: $61, and might need to tack on 16 more...

Better!  

Posted by Tin Magpie in , ,

After the keyboard fiasco, I needed a pick me up. After discussing my project with a friend, and telling him about my framing woes, he tipped me off to moulding. It's decorative, it's thin, and it's fairly cheap. Yay ideas! and YAY shopping! Off to Lowes and I find a gorgeous piece of pre-cut that fits my theme. Back on track, I went back to the garage and took apart that sweet box (which was used for tissues, my mother informed me). The glory of brass carnage...

Needless to say I feel better after a little destruction. I'll conquer the keyboard yet...

  • Hours: 1 = 14 Total
  • Cost: $56 still

Tin Vs Keyboard Pt. 1  

Posted by Tin Magpie in , ,

First: I could kill this thing, but let's continue...

I found these sweet tags at Michaels. They were a welcome sight after wasting my time looking for buttons with brass rings. They were silver, but after some paint with the greatest paintbrushes money can buy (Kids water coloring book brush, hells yeah!), they were a proper brass/gold color. Things are going great.
According to the instruction of the master Jake von Slatt, I grabbed myself a pipe, hammer and pounded away on my felt to create the keyholes. I think I accidentally bought the industrial strength felt because I ended up hammering ripples into my pipe. After hand-cutting the holes, fitting it to the naked keys, stretching it to fit better to the naked keys...I realized it totally sucked. Maybe I should have paid more attention to the way Dr. Von Slatt organized the keyboard. Maybe I should actually follow the advice I look for? Lesson learned.
A little miffed with myself, I decided to take a break and work on the keys after they'd dried. After I designed and printed out the letters then realized I had to hand cut them too. I thought I had a scrapbooking hole punch that would work...and it did not. Couple hours later, those blasted letters are all cut out and placed it their respective tags, and my neck and fingers are killing me. 6 hours spent and I retire with the wind blown out of my sails. This is no weekend project, folks.

  • Hours: 6 = 13 Total
  • Out: $56 (Bought the framing! Next post!)

Rant!  

Posted by Tin Magpie in , , ,

Shopping list in hand, I bravely set forth on my quest. I found pretty much everything that I wanted to start off with.

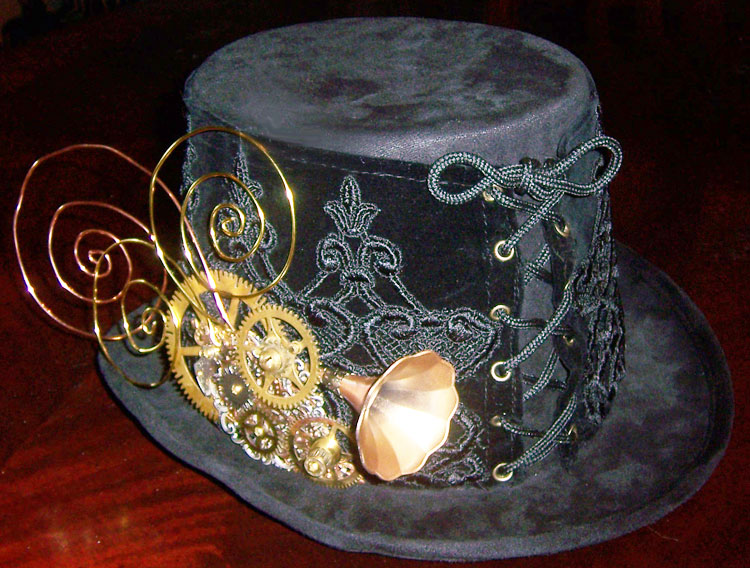
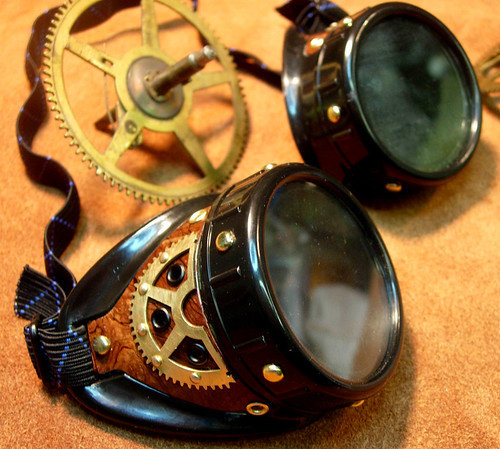
My design will have 3 major influences to it. Firstly would be Steampunk of course. After some intense studying of Steampunk culture, fashion and function I think I’m getting it. I’d like to say that I have an eye for fashion, so that’s what I focused on. Heavily Victorian influence (unless it’s Dieselpunk, which is also really awesome) so there’s top hats, floral, bustles, corsets, cuffs and other things good. There’s one classic fashion piece for Steampunk though: Gears. Gears on hats, gears on goggles, gears on iPods, gears on everything that will sit still. I don’t think that’s what makes Steampunk so steamily delicious though. One cannot simple glue some clock parts on something and call is Steampunk, at least that is my opinion. I believe, I know, that Steampunk fashion has more to it than cogs and pressurized hot water vapor. I hope, even though I am a novice, to capture that.

Second is my love: Art Nouveau. I’ve been enchanted ever since high school. Being a ‘nature’ person, it made sense, as Art Nouveau was strongly influenced by the natural flow of things. The transition between Victorian and Nouveau is…well, rather natural! The two styles should not only be able to be mixed, but actually add to each other.

Third, last, and probably less prevalent is the classic cathedral style radio. My father restores old radios, and I love the way this one looks. If you look at it, it’s not that different from the natural lines of Art Nouveau.
Sorry for the lecture! I’m just very excited after shopping for parts

  • Hours: 2 = 7 Total
  • Cash: 40.11 (so far, not including the frame yet)